Sunday, January 18, 2015

Thai Peanut Pasta Salad


A few weeks ago, I bought dinner from the deli at Byerly's.  (For anyone not from the Twin Cities, Bylerly's is a fancy and fairly expensive grocery store that we have here.)  This is something that I used to do semi-regularly when I was much younger, because they had tasty and mostly healthy options, and the store wasn't too far from my job.  Doing it now is a big treat, because it isn't by my house or my work.  But it was in my travel-path and wasn't crowded when I was out and about (and hungry) at dinner time.    

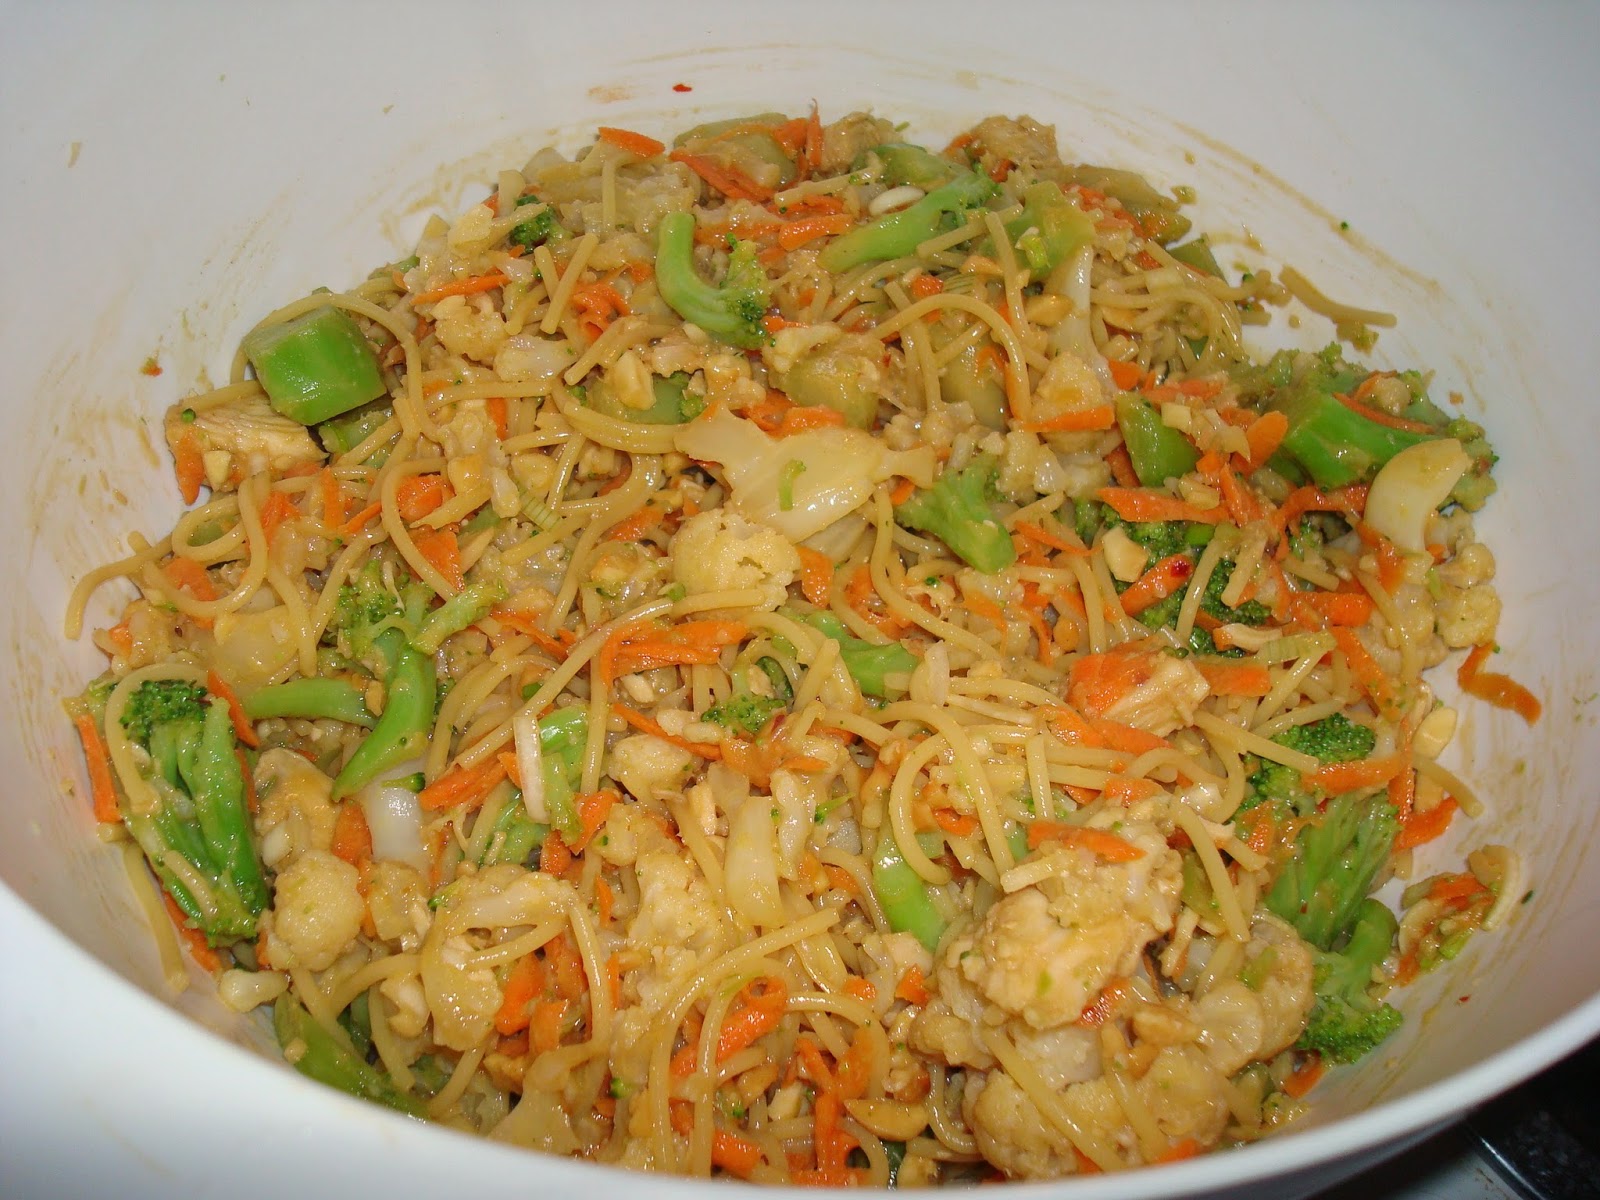
Anyway, I got a Thai peanut pasta salad that was really good. So tasty, in fact, that I decided to look up the recipe and try to replicate it myself.  After one batch that was delicious both warm and cold, I made a second batch that was a bit healthier: more veggies, different kinds of veggies, less pasta, less oil, less granulated sugar, less sodium, less chicken (or you could make it without chicken all together).  OK, it does have more peanuts and more peanut butter.  But I left out the sesame seeds and added more chopped peanuts...mostly because I was too cheap to buy sesame seeds and toast them when the original recipe only called for 2 Tbsp.  My new recipe is below.    


Ingredients:
  • 1 chicken breast, cooked  (approx. 5 oz after cooking)
  • 4 oz. uncooked thin spaghetti 
  • 1 cup shredded carrots
  • 1/3 cup finely chopped green onions
  • 1/2 cup chopped dry roasted, unsalted peanuts
  • 1 12-oz. package of steam-in-bag cauliflower
  • 1 12-oz. package of steam-in-bag broccoli
  • 1/3 cup low sodium soy sauce
  • 2 Tbsp. vegetable oil
  • 2 Tbsp. white vinegar
  • 4 Tbsp. peanut butter
  • 1 Tbsp. granulated sugar
  • 1 dash crushed red pepper


Directions:
  1. If you haven't already, cook chicken.  I used a frozen chicken breast (the kind that comes in a bag) and baked it completely for 45 to 50 minutes. 
  2. While chicken is cooking, shred carrots, chop onions, and chop peanuts.  Keep these cold ingredients separate for the time being.    
  3. Cut up chicken and put into large bowl 
  4. Break spaghetti into thirds and cook until just tender.  Drain and put in bowl with chicken.
  5. Heat up steam-in-bag veggies until just cooked and put in bowl with chicken and pasta.
  6. Measure out ingredients for sauce (soy sauce, vinegar, oil, sugar, red pepper, peanut butter) and stir into warm ingredients.  The warmth will help melt the peanut butter and make it easier to stir in evenly.
  7. Mix carrots, onions, and peanuts into the warm ingredients. 
  8. Chill, covered in the refrigerator.  


Thursday, January 8, 2015

2015 Reading Challenge


As a librarian, it seems that I get to hear a lot about what my friends and co-workers are reading, wish they were reading, wish they had time to read, etc.  Not surprisingly, most of us librarians do love to read.  Perhaps surprising to non-librarians, most of us don't get to read as much or as often as we would like...and we almost never get to read at work.

A lot of people I know are doing challenges where they are trying to read a particular number of pages or a particular number of books in 2015 (or in any year, for that matter).  I'm less concerned about that and more concerned with branching out in my reading and discovering some interesting things. So, like a good, modern librarian-type, I took to the internet to find a challenge list that spoke to me and my try-new-things goal for 2015.

I found this list on PopSugar (which is not a website I actually frequent) and it seemed like an excellent place to start. I'm going to update this blog entry with what I read in each category, as well as add them to my (brand new!) goodreads account so that I can track things.  I'm not saying that I'll get through the whole list of all different types of books, but I'll use this as a guide to read and explore new things, and to finally give myself an excuse to read some of those things that have been languishing on my to-read list.

Here's the list:


1. A book with more than 500 pages

2. A classic romance

3. A book that became a movie

4. A book published this year

5. A book with a number in the title

6. A book written by someone under 30

7. A book with nonhuman characters

8. A funny book

9. A book by a female author

10. A mystery or thriller

11. A book with a one-word title
Vicious by V.E. Schwab (364 pages, published 2013, read in hard copy checked out from library, finished 3 January 2015)
An interesting take on the idea of super-powers: what constitutes a "power," who has them, how they get them, and what powers people end up with. This was the Dec/Jan book for the Amazing Book Club of Doom.  

12. A book of short stories

13. A book set in a different country

14. A nonfiction book

15. A popular author’s first book

16. A book from an author you love that you haven’t read yet

17. A book a friend recommended

18. A Pulitzer Prize-winning book

19. A book based on a true story

20. A book at the bottom of your to-read list

21. A book your mom loves

22. A book that scares you

23. A book more than 100 years old

24. A book based entirely on its cover

25. A book you were supposed to read in school but didn’t

26. A memoir

27. A book you can finish in one day

28. A book with antonyms in the title
Inside Out by Maria V. Snyder  (320 pages, published in 2010, read on my phone, finished 8 Jan. 2015)
I was a fan of Snyder's Study series (starting with Poison Study) and thought the idea of Inside Out was very cool.  It is her first book written for a young adult audience and the main character is a young woman living in a dystopian reality where there is a literal hierarchy.  She is one of the "lowers"--the workers--but she works cleaning the air vent system, which gives her the opportunity  to explore higher levels.  I described it on my Goodreads account as "Sort of Cube meets Snowpiercer meets Hunger Games/Divergent."

29. A book set somewhere you’ve always wanted to visit

30. A book that came out the year you were born

31. A book with bad reviews

32, 33, 34. A trilogy

35. A book from your childhood

36. A book with a love triangle

37. A book set in the future

38. A book set in high school

39. A book with a color in the title

40. A book that made you cry

41. A book with magic

42. A graphic novel

43. A book by an author you’ve never read before

44. A book you own but have never read

45. A book that takes place in your hometown

46. A book that was originally written in a different language

47. A book set during Christmas

48. A book written by an author with your same initials

49. A play

50. A banned book

51. A book based on or turned into a TV show

52. A book you started but never finished

DIY customized "white" board: Fancy and utiliarian


I wrote before about my salon-style wall with lots of different frame sizes, types, designs, etc. One of the things I definitely wanted on this wall from the beginning was a chalkboard.  Mostly because it would be a utilitarian thing.  

I used chalkboard paint in one of my homes in grad school.  I painted several large-ish cardboard rectangles, which I interspersed with same-sized cardboard rectangles covered with brightly colored, patterned fabric from the $1 clearance bin.  This made for a cheap and amazing wall.  It was decorative and utilitarian.  My roommate and I wrote grocery lists, to do lists, and who owed who money from recent shopping/outings.  I loved it!  However, the one problem was that the cardboard was not a very long-term base for a chalkboard.  It soaked up a ton of paint and lasted great for a year, but was never meant to be forever.  

For my grown-up house, I wanted something more durable, so I figured I would paint my chalkboard over the glass already in a large frame.  However, the difficulty of getting cheap chalkbaord paint that I knew would stick to glass made me change my mind a bit. (There is a special kind of chalkboard paint for glass, but it is normally sold in tiny bottles for use on glassware.) I also started thinking about having chalk dust flying around and ultimately decided to go in another direction: custom "white" board. 

One of the fun things about white board markers is that they work well on all kinds of slick surfaces, including glass.  Ever see a mathematician or a crime-solver writing on windows or glass walls on TV or in a movie?  That's what I'm talking about.  

The one thing is that it can be hard to read markers on glass, because of the transparency factor.  Opaque boards have the advantage on this front.  But I also had two issues: 1) I didn't want to pay for white board material and 2) I didn't want to use anything that was hard to cut to fit in my frame.

I came up with a solution that is working really well for me:
  1. I already had a large frame with nice glass in it that would work well.  (I got it from my mom.  She was going to donate a bunch of old frames to the Goodwill, but a few were diverted to me.)  My frame is about 16 X 20 and I spray-painted it to match the rest of the frames on my frame-wall.  
  2. Bought a piece of poster board ($0.50 at the Dollar Tree) and cut it to fit inside my frame, right up against the glass. 
  3. Found a fabric for the background that was cheap, attractive, and not too busy.  You could use any plain color, light pattern, etc., but I bought a silver-on-silver floral patterned fabric from the clearance rack at my local Hancock Fabrics.  It clocked in at about $2.50 a yard and 3/4 yard was more than enough.
  4. Tightly covered my poster board rectangle with the fabric, folding the extra to the back and securing with tape.  
  5. Put the fabric covered rectangle in the frame like a photo and then closed the whole thing up. 
  6. Custom "white" board finished and ready to use! 

Cost for the customization:
  • Frame--Free 
  • Spray Paint--$4 (but also part of a larger project)
  • Poster Board--$0.50
  • Fabric -- under $2
  • Total--Under $7!


Mary Poppins Costume Accessories


I know that it is now January, but I wanted to catch up with several of my older projects that are worth documenting and sharing.

Because I love Halloween (LOVE it!), I decided long before the end of October that I would have two different Halloween costumes in 2014: one for work and one for my now-annual Halloween party.  I also decided to be Mary Poppins for work.  Why?  Well, it is a costume that is mostly based around things that I either already had or could acquire cheaply...a main point in favor of any costume.  More importantly, however, it was something that could be work appropriate if you stretch the idea of business casual just a tiny smidge.  (Although, to be fair, my boss is OK with us dressing up....as long as we don't get too crazy.)

The main costume consisted of a made-by-me black circle skirt with a made-by-me black crinoline under it to give it shape.  (I know, I know.  Not authentic to have Mary Poppins in a swirly skirt.  But it was MY costume.  Also, I made these in 2013 when I made my wind-up doll costume.  Yeah, I know.  That WAS cool.)  A white button-up shirt, black tights, black heels, and black blazer completed the actual outfit.

As for basic accessories, I added a $1 red bow tie--I think I found it at the dollar store--and a red grosgrain ribbon belt (ribbon purchased with a coupon at JoAnn fabrics) that I affixed to itself and my skirt with fashion tape (also purchased with a coupon at JoAnn's).

BTW: If you haven't tried fashion tape, you should.  It works on gaps in shirts, missing buttons, broken hems, keeping necklines up/work appropriate, etc.  I love this stuff!  The best kind comes in pink and black packaging and can come in either a tin of strips or a roll of tape.  Cost saving tip: Don't bother buying the dispenser if you buy the rolls; just keep a set of scissors with it in your drawer/dresser/bathroom.

As for the other accessories, I needed two other things: Mary's distinctive hat and her talking bird umbrella.  I bought the basis for both at the Goodwill.  The hat was a costume bowler-style hat that was new and cost me about $3.  The umbrella had an L-shaped handle and was also about $3.

To decorate the hat, I purchased one piece of thick white scrapbook paper embossed with flowers of different types.  I cut out a few of the flowers, colored the centers yellow-orange, and attached them with double-stick tape.  I also purchased ($1) a small bunch of Christmas greenery that had some berries on it.  I used just the 2 bunches of berries, tucked in the band of the hat.

To make the umbrella, I bought two different colors of air dry clay.  It is super light-weight and sold in the kids' section of craft stores.  My packages were a light, bright green for the main head and beak, and a white for the eyes.  Crayola makes a nice version, but many craft stores have a generic version as well.  Again, I had a coupon for both packages.  I molded the green clay around the l-shaped handle, using the handle as an armature that would support the beak.  I spread the clay down around the main handle, to be sure that it would stay on and sort of become a part of the handle.  I let the surface dry and then added the small white round pieces for the eyes.  The next day, I used multi-colored Sharpie markers to color the beak, add "feathers" to the neck, and add details to the eyes.  Then I left the bird to totally dry for another 2 days.

If I had needed to ditch my costume quickly--for an unexpected meeting with someone important, for example--I would have left the hat and umbrella at my desk with the bow tie, buttoned my blazer, and perfectly ready. Also, I now have all these items and accessories, so a costume party at a non-Halloween time would be no problem (Purim, anyone?).

Most important lesson to impart on costume making: think ahead.  This helps both with the gathering of items and the ability to comparison-shop/save money.  Several 50% and 60% off coupons saved me huge, as did the ability to make a few trips to find just the right items at the thrift shop.

After work on Halloween, a small group of people from work played trivia at Summit Brewery.  We got second place, and so Michael, Tim, Rosie the Riveter, and Mary Poppins had a photo taken to commemorate our near-win.


Monday, January 5, 2015

Use a Coaster Already!


One of my friends has a really nice, really large table that is perfect for board games and a big crowd of fun people.  He--very reasonably--wants people to use coasters for their drinks to keep the table nice.  However, he only had two kinds of coasters: disposable cardboard ones (think bar coasters) that somehow keep getting reused and old, cool ones from his mom that are perfect for bottles or cans but are a little small and uneven for mugs, glasses, etc.

To solve this lack-of-appropriate-coaster issue, I decided to make him a set of customized coasters that would work for any beverage.  His set of 6 would be from the Avengers, because he freaking loves the Marvel cinematic universe and insisted that we watch the movies all in order before we could go see The Guardians of the Galaxy.  (Somehow he thought we wouldn't understand GofG without seeing the other movies.  No so much, really, though there were a few inside-moments that built on things from the other films....anyway...)

To make the coasters I first needed supplies:


  • The base of the coasters were 4.25 inch square white tiles from the Home Depot.  They cost somewhere in the range of 20 cents each and I bought an extra, just in case.  
  • The images I painstakingly made in a simple Paint program (because that is what I have) and then I had them printed on photo paper at my local Target.  I made sure that my images would be exact squares that would fit on 4inch by 6inch photo paper. There was an issue initially with the very edges of my emblems getting cut off, and I had to resize and do them again.  The best way seemed to be making the image square, printing it on rectangle paper, and then trimming it down to the square I wanted.  
  • I purchased Mod Podge, both to glue the images onto the tiles and to create an initial layer on the top of the coaster.  I used glossy.  However, it is important to note that Mod Podge is not waterproof.  So for coasters that are not just decorative, you need a more waterproof topcoat.
  • I bought a Ceramcoat gloss exterior/interior varnish for the actual topcoat layers, figuring that anything meant to protect outdoors could probably stand up to some condensation from glassware.  
  • For padding on the bottom of the coasters--so that they wouldn't scratch the table whist providing protection from water-rings--I get some self-adhesive felt.  Fuzzy on one side and sticky on the other.  
  • I used a foam brush, though other kinds of brushes might have put fewer texture lines in the glossy finishes.  

Here is my process:

1.  Cut images to be 4inch squares. Hint: use a paper-cutter to get a nice straight line.
2. Lay out tiles on newspaper so that you can work quickly and efficiently.
3.  Coat the reverse side of the image with an even coating of the ModPodge and affix to tile, centering it and smoothing out any bubbles, extra glue, etc.
4.  Coat with multiple coats of ModPodge, being sure to make it as even as possible and not forgetting to coat the edges.  The ModPodge goes on opaque white, but dries clear. See Capt. America image below.  Also, be sure to let the ModPodge dry completely between layers.  With my house's heat on, the coats dried very quickly.  Also, be sure to pick up tiles after a layer is dry so that they don't stick to the newsprint.  If some sticks on, just rub or smooth it off the bottom and/or edges
5. When the last ModPodge layer is dry (I did 3 layers), start layering on the varnish layers.  (I added 3 varnish layers, too.)  Again, make sure one coat is dry before adding the next. 
6. When all the coating layers are finished, make sure to let them dry/cure out.  I let mine do so for the afternoon and then overnight.  
7. The final step is adding the felt to the reverse side. I cut the felt into squares just smaller than the 4.25 inch tiles...approximately the same size as my images on the top side.  
8.Even though my felt had an adhesive layer, I added a bead of superglue to each corner, just for added security. 
9.And there you have it, a customized set of utilitarian coasters.  Form and function unite!!